

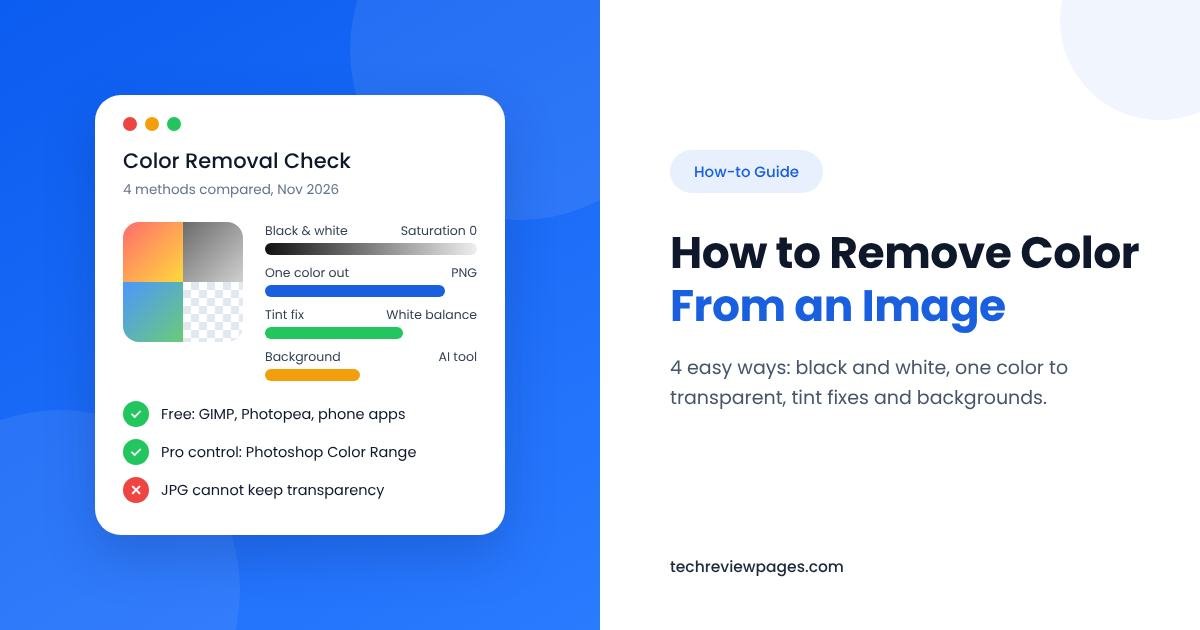
“Remove color from an image” sounds like one simple job. In practice, people mean four different things. Some want a classic black and white photo. Others want to erase one color, like a white box behind a logo. Some want to fix a yellow or blue tint. A few want to take out the background color completely.
Each goal needs a different color removal tool. Pick the wrong one and you get a flat gray mess or a logo with jagged edges. This guide from Tech Review Pages shows you which method fits your goal. Then it walks you through the steps on your phone, in free online editors and in Photoshop, GIMP, Canva or even PowerPoint.
Quick Answer: How Do You Remove Color From an Image?
To make it black and white: lower the Saturation slider to zero, or use a Black & White or Grayscale filter.
To erase one color and make it transparent: use a Color Range, Magic Wand or Color to Alpha tool, then save as a PNG.
To fix a color tint: use the white balance eyedropper on something that should be white or gray.
To remove the background color: use a background remover, then save with a transparent background.
First, Decide What Kind of Color Removal You Need
| Your Goal | What It Is Called | Best Tool | Save As |
|---|---|---|---|
| Turn a photo black and white | Desaturation or grayscale conversion | Saturation slider, Black & White filter | JPG or PNG |
| Remove one specific color, like white | Color to transparency (alpha) | Color Range, Magic Wand, Color to Alpha | PNG |
| Remove only one color but keep the rest | Selective desaturation | Hue/Saturation for one color channel | JPG or PNG |
| Fix a yellow, blue or green tint | Color cast removal | White balance tool | JPG |
| Take out the whole background | Background removal | AI background remover | PNG |
Once you know your goal, jump to the matching section below. Each one covers free tools first, then pro options.
Grayscale vs Black and White vs Monochrome: What Is the Difference?
These words get mixed up all the time, but they mean slightly different things.
- Grayscale keeps every shade from black to white. Most “black and white photos” are really grayscale.
- True black and white uses only two colors: pure black plus pure white. This look suits logos, stamps and line art. Editors call it threshold or binarization.
- Monochrome means one color in many shades. Grayscale is one type of monochrome, but so is a sepia or blue-toned photo.
There is one more detail that makes a big difference. Every photo is built from three RGB channels: red, green and blue. Each tool mixes those channels into gray with its own formula. Some formulas treat the channels almost equally, which can look flat. Others weight each channel by how bright it looks to the human eye, which is called luminance. Green looks brightest to us, so it usually counts the most. Blue counts the least.
That is why a good Black & White tool usually looks richer than a basic Desaturate command. It also lets you darken a blue sky or brighten skin by changing how much each color counts.

Method 1: How to Make an Image Black and White
This is the most common way to remove color from a photo. Editors call it the desaturate image method, since it drains all color out. Every black and white photo editor can do it. Here is how in the most popular ones.
In Photoshop
- Open your image, then go to Image, Adjustments, Black & White. The shortcut is Alt + Shift + Ctrl + B on Windows or Option + Shift + Cmd + B on Mac.
- Drag the color sliders to fine-tune the result. For example, move the Blues slider left for a darker, moodier sky.
- Click OK, then save a copy so you keep the color original.
For a quick result without sliders, use Image, Adjustments, Desaturate (Shift + Ctrl + U). It is faster but gives you less control. Afterward, nudge brightness or contrast up a little so the photo pops.
This is also the simplest answer to how to remove a color from an image in Photoshop when you want the whole picture gray.
In GIMP (Free)
- Open your photo in GIMP.
- Go to Colors, Desaturate, Desaturate.
- Pick a mode. Luminance usually looks most natural. Average or Lightness can look flatter.
- Click OK, then export with File, Export As.
For more control, try Colors, Desaturate, Mono Mixer. It works like Photoshop’s channel sliders.
In Photopea (Free, Online)
Photopea runs in your browser and uses Photoshop-style menus. Open your image, then choose Image, Adjustments, Black & White or Desaturate. Export with File, Export as. It is a handy way to remove color from an image online for free without installing anything. It handles far more than black and white, too.
In Canva
- Drop your photo onto a Canva design.
- Select the photo, then click Edit.
- Open Adjust and drag the Saturation slider all the way to the left.
- Download your design.
Canva also has black and white filters in the same panel, which work as a quick grayscale filter. Try a few to see which one has the best contrast.
On iPhone
Open the photo in the Photos app and tap Edit. Tap Filters, then choose Mono, Silvertone or Noir. Noir gives the strongest contrast. You can also tap Adjust and drag Saturation down to zero. Tap Done to save. You can undo it later with Revert.
On Android
In Google Photos, open the image and tap Edit. Go to Adjust, then slide Saturation all the way down. Menus vary a little between app versions, so you may also find black and white styles in the Filters tab. Tap Save copy to keep your original.
In PowerPoint or Word
This is handy for slides or reports. Click the picture, then open Picture Format. Choose Color, then pick Grayscale under Recolor. Office keeps the original, so you can switch it back anytime.
In Paint.NET (Windows, Free)
Go to Adjustments, Black and White, or press Ctrl + Shift + G. It is a quick, no-settings conversion.
Method 2: How to Remove a Specific Color and Make It Transparent
This is what most people mean by an image color remover. You pick one color, like the white box behind a logo or a green screen, then turn it see-through. With green screens, this is called chroma key. The key rule: save the result as a PNG. JPG (JPEG) files cannot store transparency. When you save one, the editor fills the clear areas with a solid color, usually white.
In Photoshop: Select Color Range
- Double-click the Background layer to unlock it.
- Go to Select, Color Range.
- Click the color you want to remove with the eyedropper.
- Drag the Fuzziness slider until the whole color area is selected, but not your subject.
- Click OK, then press Delete.
- Save with File, Export, Export As, then choose PNG.
For a solid area, the Magic Wand tool works too. Turn off Contiguous in the top bar to grab that color everywhere in the image.
In GIMP: Color to Alpha
GIMP has a clever tool made for this exact job. Go to Colors, Color to Alpha, then pick the color to remove. GIMP turns that color transparent while keeping soft edges smooth. It works great for removing a white background from a scanned signature or logo. Export as PNG when you finish.
To remove only part of a color, use the Select by Color tool first. Then press Delete.
In PowerPoint or Word: Set Transparent Color
In the desktop apps, click the picture, open Picture Format, choose Color, then Set Transparent Color. Click the color you want to remove. This only removes one exact color, so it works best on simple graphics with a flat background. The option is not in every version, such as the web apps, so check your Color menu.
In Paint.NET
Choose the Magic Wand tool, click the color, then adjust the Tolerance in the toolbar. Press Delete, then save as PNG.
With Free Online Color Remover Tools
Many free websites let you remove color online. You upload an image, click a color, then download a transparent PNG. Most follow the same pattern: pick the color, raise a “tolerance” or “threshold” slider to catch similar shades, then download. They are quick for simple jobs, much like a basic way to desaturate a photo online.
Privacy: Does the Tool Upload Your Image?
This matters more than most people think. Some online tools send your image to their server. Others process it right in your browser, so the file never leaves your device. Here is how to tell the difference:
- Read the privacy note. Tools that work locally usually say so clearly, with words like “processed in your browser.”
- Try it offline. Load the page, turn off Wi-Fi, then try the tool. If it still works, it is processing locally.
- Watch for sign-ups. A tool that needs an account often stores your files in the cloud.
- Keep private images on your device. For client work, IDs or personal photos, use a desktop editor like GIMP instead.
Tip: Getting Clean Edges
Start with a low tolerance, then raise it slowly. Too high and you will eat into your subject.
Zoom in to check edges. Look for a thin halo of the old color.
Use the biggest file you have. Small, compressed JPGs have fuzzy color edges that are harder to remove.
Test on a dark background. Place your PNG over black to spot leftover white pixels.
Removing Color From a PNG vs a JPG
The file type you start with changes how clean your result will be.
| Starting File | What to Expect | Tip |
|---|---|---|
| PNG with a flat color | Clean removal. Colors are exact, with no compression noise | Use a low tolerance for crisp edges |
| JPG photo or logo | Edges show blotchy halos from compression | Raise tolerance a little, then clean the edges |
| Screenshot | Usually clean, since screenshots are often saved as PNG | Crop first so you only work on what you need |
| Scan or phone photo of paper | The “white” is really many light grays | Boost brightness first, then remove white |
JPG halos happen because JPG compression blends nearby pixels to save space. The edge of a logo ends up mixed with a little of the background color. If you see a thin white or colored fringe after removal, try these fixes:
- Photoshop: go to Layer, Matting, then Defringe or Remove White Matte.
- GIMP: use Color to Alpha instead of a plain delete, since it softens edge pixels.
- Any editor: shrink the selection by 1 pixel before you delete.
Whenever you can, ask for the original PNG or SVG file of a logo. It saves a lot of cleanup.

How to Remove a Green Screen or Blue Backdrop From a Photo
Green and blue screens are made for color removal. Few things in a scene share that exact bright color, so tools can pick it out easily. This is called chroma keying.
- Light the backdrop evenly. Shadows or wrinkles create many shades of green, which are harder to remove.
- Select the backdrop color. Use Color Range in Photoshop or Photopea. In GIMP, use Color to Alpha with the green color.
- Delete the color. Save as PNG if you want transparency, or place a new background layer underneath.
- Fix green spill. Green light often reflects onto hair and edges. Open Hue/Saturation, choose Greens, then lower the saturation on those edges.
Wear clothes that do not match your backdrop. A green shirt in front of a green screen will vanish too.
AI Removal vs Color-Based Removal: Which Should You Use?
Many tools now offer AI-powered color or background removal. It works very differently from a classic color picker.
| Method | How It Works | Best For | Weak Spot |
|---|---|---|---|
| Color-based (Color Range, Magic Wand, Color to Alpha) | Removes every pixel close to the color you pick | Logos, flat graphics, green screens, signatures | Also removes that color inside your subject |
| AI-based (background removers) | Finds the main subject, then removes everything else | Photos of people, pets, products | Can miss fine details or remove the wrong object |
A simple rule: if the color you want gone is flat and solid, use a color tool. If the background is a real scene, use AI. Removing objects, like a person in the background, is a different job again. Tools such as Canva’s Magic Eraser handle that.
Method 3: How to Remove Only One Color but Keep the Rest
Sometimes you want to remove unwanted color in one area without touching anything else. In other words, you want to remove a certain color from an image while the rest stays the same. For example, you might want to turn a red car gray while the rest stays colorful.
- In Photoshop or Photopea, go to Image, Adjustments, Hue/Saturation.
- Change the dropdown from Master to the color you want, such as Reds.
- Drag Saturation to -100. Only that color turns gray.
- Adjust the range sliders at the bottom if nearby colors change too.
Want the opposite? To make only part of an image black and white, add a Black & White adjustment layer. Then paint black on its mask over the part you want to stay in color. This “color splash” look is popular for posters and wedding photos.
Method 4: How to Remove a Color Cast or Tint
A color cast is an unwanted tint over the whole photo. Indoor lights often add yellow or orange. Shade and snow often add blue. Removing it is called white balance correction.
- Photoshop: try Image, Auto Color first. For more control, open Filter, Camera Raw Filter, then click the White Balance eyedropper on something white or gray.
- Lightroom: in the Edit panel, use the White Balance eyedropper, then fine-tune Temp and Tint.
- GIMP: use Colors, Auto, White Balance.
- Phones: in the Photos app, lower Warmth to remove yellow or raise it to remove blue.
Not sure which Adobe app fits you? Our Photoshop vs Lightroom comparison explains the difference in plain words.
What About Removing the Background Color?
If you want to remove the background color from an image entirely, a flat color tool may not be enough. Real photos have shadows and soft edges. An AI background remover separates the subject from everything behind it, whatever the color.
For a step-by-step walkthrough, see our guide to removing a background in Canva. Online sellers can also check our ecommerce photo editing guide for white background rules.
How to Batch Convert Many Images to Grayscale
Converting a few photos by hand is fine. When you need to convert image to grayscale for a whole folder, use a batch method. This kind of image processing saves hours.
- Photoshop: record an action that applies Black & White and saves the file. Then run it with File, Automate, Batch.
- Lightroom: convert one photo, then sync the settings to the rest of the selection.
- ImageMagick (free, command line): this tool can convert a whole folder in one command, as shown below.
ImageMagick Commands
One image to grayscale:
magick photo.jpg -colorspace Gray photo-gray.jpgA whole folder:
magick mogrify -path gray -colorspace Gray *.jpg (create the "gray" folder first, so your originals stay safe)Make white transparent:
magick logo.png -fuzz 10% -transparent white logo-clear.pngThe -fuzz value works like a tolerance slider. Raise it to catch more shades of the color.
Does Removing Color Reduce Image Quality?
Removing color does not lower sharpness or resolution. Your photo keeps the same pixel size. However, a few things are worth knowing:
- Color information is gone for good once you save over the file. Always keep a copy of the original.
- File size can shrink if you save in a true grayscale mode, since the file stores one channel instead of three.
- Flat results are common with basic desaturation. Add a little contrast afterward to bring back depth.
- Transparency needs PNG. If you save a transparent image as JPG, the clear areas turn white.
In short, the best file format for black and white photos is JPG for sharing or PNG when you need transparency.
Use Grayscale to Check Your Designs for Color Blindness
Removing color is not only a style choice. Designers also use it as a quick accessibility test. About 1 in 12 men have some level of color blindness, most often trouble telling red from green. So do about 1 in 200 women, according to the University of Texas Medical Branch’s accessibility team.
The web’s main accessibility standard, WCAG, includes Success Criterion 1.4.1, Use of Color. It is a Level A rule, the most basic level. It says color should not be the only way you share information. Here is a simple test:
- Take a screenshot of your chart, infographic or button design.
- Convert it to grayscale with any method above.
- Check if the meaning is still clear. Can you tell the red line from the green line? Can you see which button is active?
- If not, add labels, patterns, icons or stronger contrast.
Case Study: How Removing Color Changes What People Notice
Before you strip the color from an image, it helps to know how much color affects viewers. Bright reds and blues grab attention, which is exactly why app designers use them. Researchers have tested what happens when that color disappears.
Alex Holte of the University of Cincinnati’s Blue Ash College led one such study, published in Current Psychology (2023). In it, 133 college students visited a lab twice. Between visits, 63 of them switched their phone screens to grayscale.
The grayscale group showed a clear drop in screen time and problematic phone use. They also reported less anxiety, though the authors noted this change may not be large enough to matter clinically. Depression scores did not change.
An earlier university news report from October 2022 described separate grayscale research by the same lead author. It covered about 220 students. In that work, grayscale cut phone use by an average of 39 minutes a day.
What This Means for Your Images
- Color pulls the eye. If you want viewers to notice one thing, keep that part in color and mute the rest.
- Black and white feels calmer. Black and white photography suits serious topics, portraits or minimal brand designs.
- Remove color with purpose. In ads or product listings, shoppers usually need to see real colors to trust what they buy.
Best Tools to Remove Color From an Image
| Tool | Price | Black and White | Remove One Color | Best For |
|---|---|---|---|---|
| Adobe Photoshop | Paid subscription | Yes, with channel sliders | Yes, Color Range | Full control |
| GIMP | Free | Yes, several modes | Yes, Color to Alpha | Free desktop editing |
| Photopea | Free with ads | Yes | Yes, Color Range | Photoshop-style tools in a browser |
| Canva | Free; Pro paid | Yes, saturation and filters | Limited | Quick social graphics |
| PowerPoint or Word | Microsoft 365 | Yes, Recolor | Yes, one exact color | Slides and documents |
| Paint.NET | Free (Windows) | Yes | Yes, Magic Wand | Simple Windows edits |
| iPhone and Android photo apps | Free | Yes | No | Fast edits on the go |
| ImageMagick | Free | Yes, batch | Yes, -transparent | Converting many files |
Other image editing software can do these jobs too. Canva now gives away Affinity, which includes Affinity Photo, at no cost. It has a Black & White adjustment with channel sliders, plus a Flood Select tool for picking one color. Online editors like Pixlr or Fotor offer one-click black and white filters. Some also add sepia or blue-toned monochrome styles. For more free choices, see our free photo editing software roundup. New to editing? Start with our photo editing software for beginners picks.
Conclusion: Method That Matches Your Goal
Learning how to remove color from an image starts with one question: what do you really want to remove? If you want a classic look, lower the saturation or use a Black & White tool. If you want to erase one color, select it with Color Range, Magic Wand or Color to Alpha, then save as a PNG. If your photo looks too yellow or blue, fix the white balance instead.
You do not need expensive software for any of this. GIMP, Photopea, Canva, PowerPoint and your phone’s photo app can handle most jobs for free. Photoshop gives you the finest control, while ImageMagick saves hours on big batches.
Whatever you choose, keep a copy of the original, check edges at full zoom and test transparent files on a dark background. With the right method, removing color takes seconds, not hours.
Frequently Asked Questions
How can I remove color from an image for free?
Lower the saturation to zero in any free editor, such as GIMP, Photopea, Canva or your phone’s photo app. To erase one color, use GIMP’s Color to Alpha or Photopea’s Color Range.
How do I remove a specific color from an image?
Select the color with a Color Range, Magic Wand or Select by Color tool. Then press Delete and save as a PNG to keep the transparent area.
How do I remove a color from an image in Photoshop?
To make that color transparent, use Select, Color Range, then press Delete. To turn only that color gray, use Hue/Saturation, pick the color channel, then set Saturation to -100.
How do I remove the background color from an image?
For a flat color, use Color to Alpha or Magic Wand. For a real photo, an AI background remover gives cleaner edges. Save the result as a PNG.
What does desaturating an image mean?
It means lowering the strength of all colors. Fully desaturated, the image turns into shades of gray.
How do I turn a colored logo into black and white online?
Open it in Photopea or Canva, then lower saturation to zero. For pure black and white with no gray, use Photopea’s Threshold adjustment.
How do I remove color from an image on iPhone?
Open the photo in Photos, tap Edit, then Filters, then choose Mono, Silvertone or Noir.
Can I remove color from an image without Photoshop?
Yes. GIMP, Photopea, Paint.NET, Canva, PowerPoint and your phone’s photo app can all do it for free or with tools you may already own.
Does removing color reduce image quality?
No. Sharpness and size stay the same. Only the color data is removed, so keep a copy of the original.
